Exercise 4
Part C: Texturing in Blender (Optional)
Depending on the aims of your reconstruction, you may wish to texture your reconstructed features. Though our prompt does not specify that texturing/colouring is required, you may want the reconstruction to look more realistic, or you may want to differentiate between reality-captured data (untextured) and 3D modelled data. The basics of texturing in Blender will be outlined below, but this is by no means comprehensive. There are many tutorials online that guide you through the processes of UV mapping and texturing in Blender; some will be highlighted below.
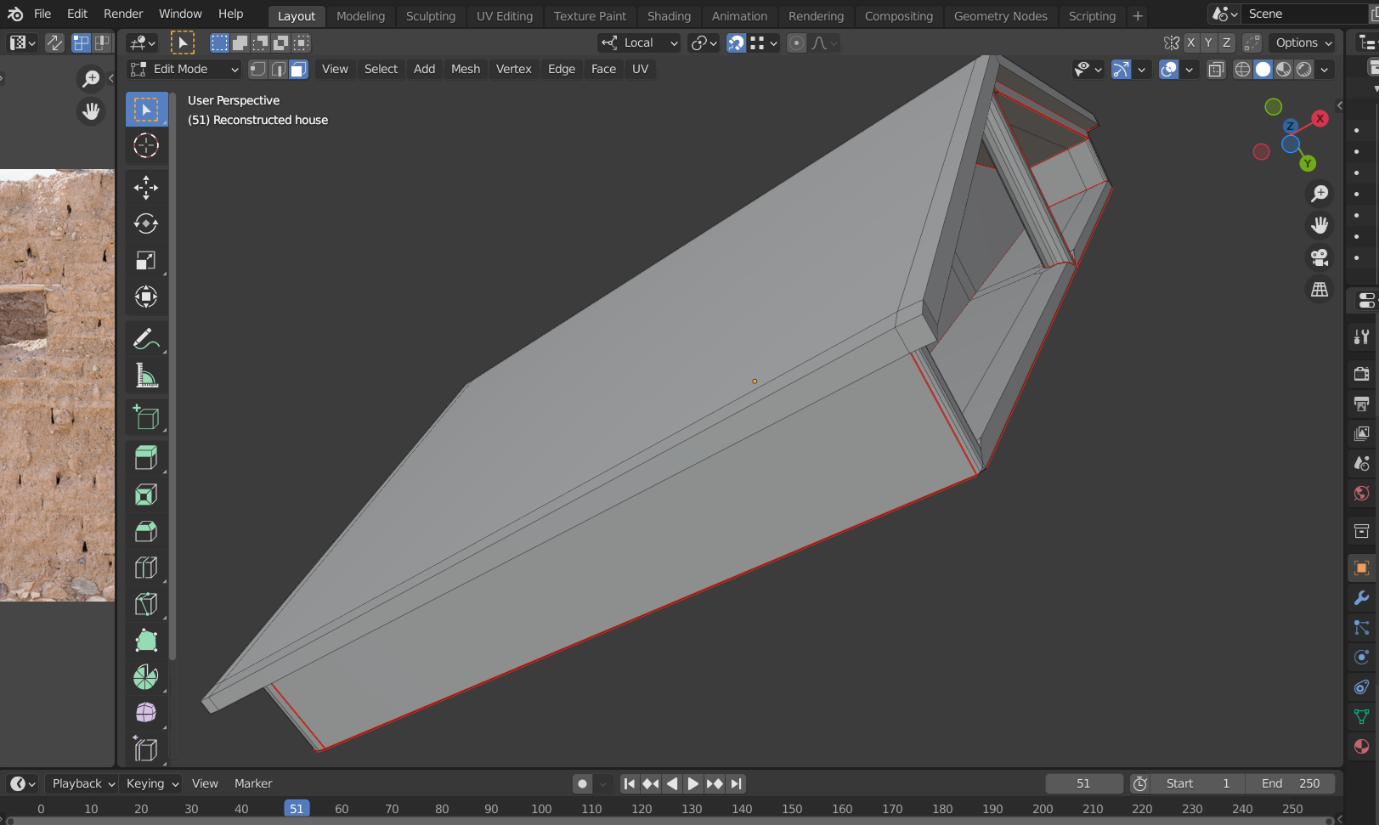
For texturing, you will need to add seams to ensure that you unwrap the reconstructed structure’s geometry in a calculated way rather than the ‘automatic’ way we used when generating Normal maps (Exercise 3). This will help your textures to make sense, i.e. so bricks end or continue in sensible ways. To help you visualise this, consider how many textures you will need for your reconstruction – where will the ‘roof’ texture end? Will you need the same texture for the top and sides of the roof, or will you need different textures for these?
To create your own seams, ensure that your Layout workspace is in Edit mode with ‘Edge select’ enabled. Left click to select individual edges; you can also ‘Ctrl + left-click’ anywhere on the mesh and it will find the shortest path between your starting and ending points. When you are happy with your seam, right click anywhere in the layout space and click ‘create seams’. Once you are happy with your seams, change to ‘Face Select’, press the ‘A’ key to select all, the ‘U’ key to unwrap.
The creation of seams and planned UV maps takes a great deal of practice – while the basics are given here, we would recommend that you explore other tutorials to develop this skillset, like this video by Darrin Lile.

There are many ways to add colour or texture to your reconstruction once it is UV mapped. There are a number of websites where you can acquire some freely available textures, like textures.com. You can also apply solid colours to give some sense of materiality to your structure. Finally, there is the ‘texture painting’ option, which will not be addressed here.
Try it yourself! Navigate to textures.com – which textures would be suitable, based on Dr Worsham’s discussion in Exercise 2? search for ‘mud brick wall’ or ‘clay wall’? Which would you choose? Think about what the surrounding landscape looks like? What is a reasonable colour for mud brick based on this knowledge?
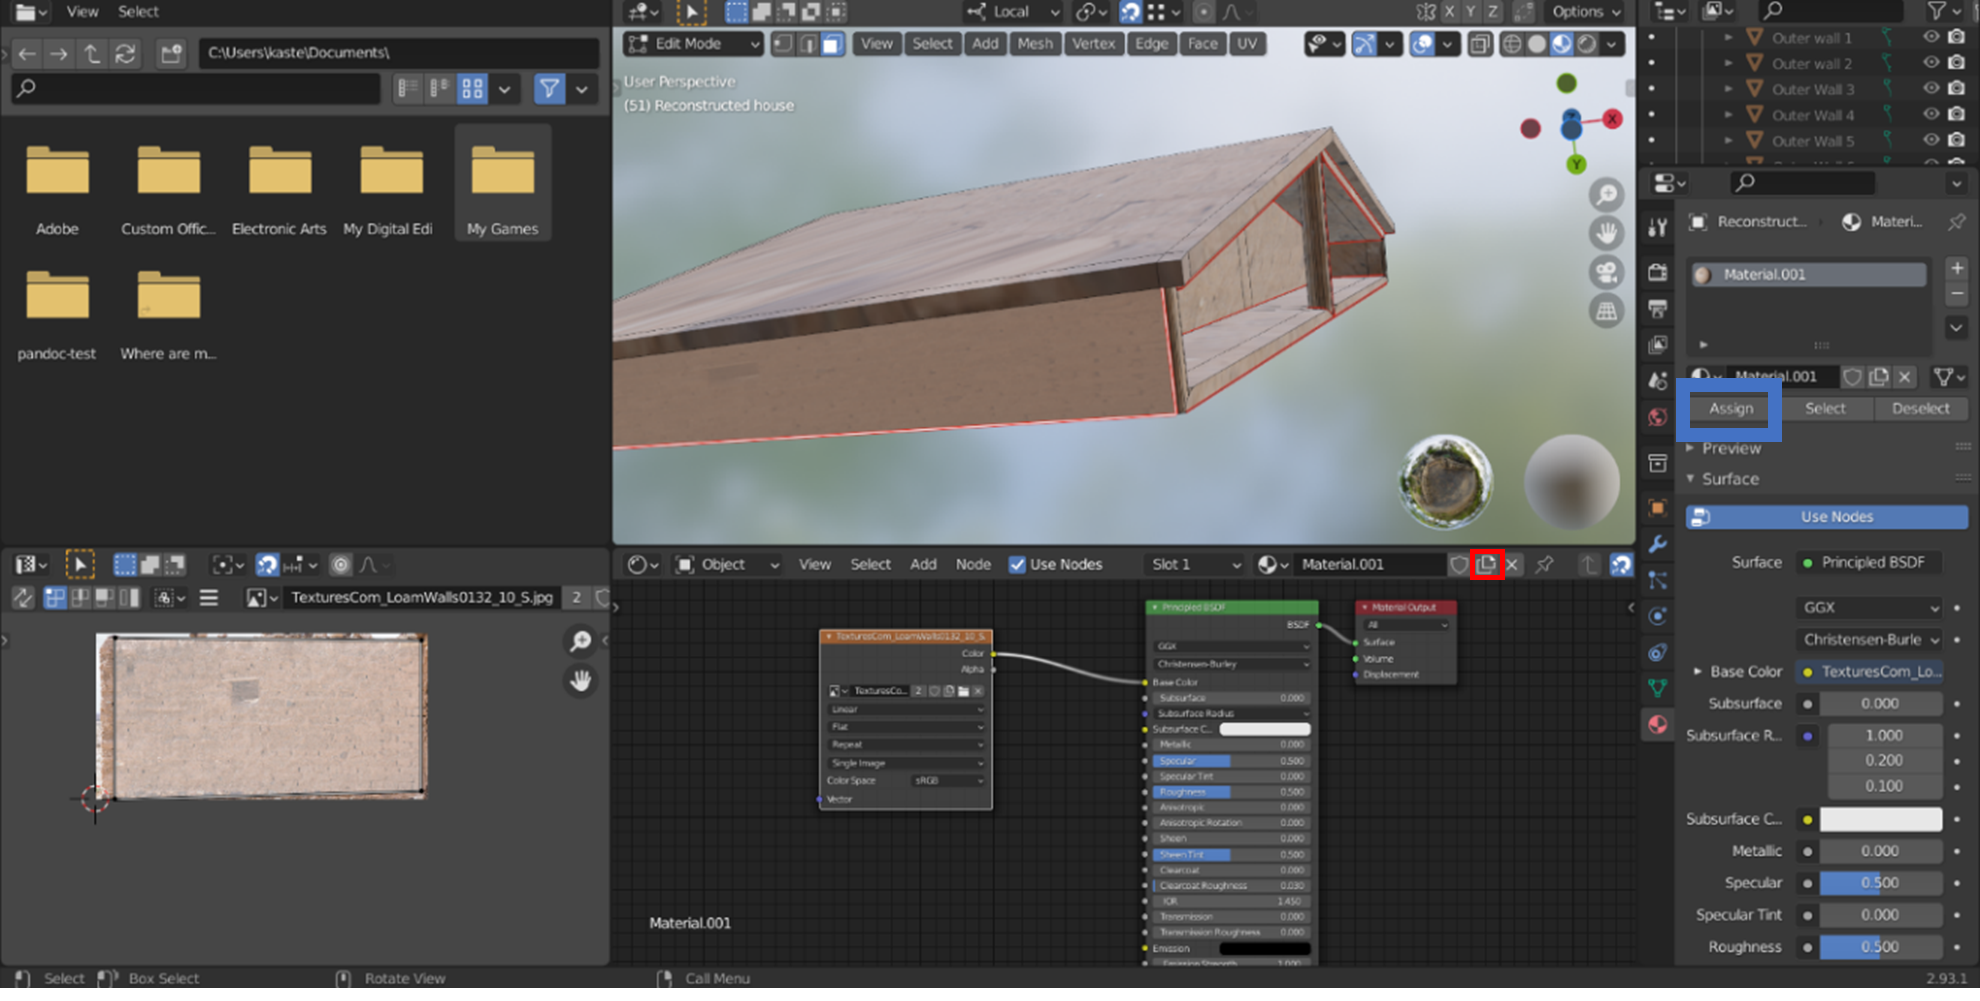
With the Shading workspace open and Shader Editor visible, add a new material in the Shader Editor viewport (highlighted with a red box). Then, click and drag the texture file from wherever you saved it into the Shader Editor to create a new node; connect the ‘color’ option on your Texture node to the ‘base color’ of your Principled BDSF node.
Select one of the faces of your structure; ensure that the ‘UV Editor’ window is visible, and you should see the UV island for that feature. Assign the texture to that feature (by clicking the ‘Assign’ button in the ‘Material Properties’ window, highlighted with a blue box below). The UV island should be visible on your texture file in the UV Editor window. You may need to resize the UV island to fit the area of the texture you wish to apply – and it is easy to accidentally apply the texture upside-down when the wrong vertices of the UV island are dragged to the wrong corners of the texture image.
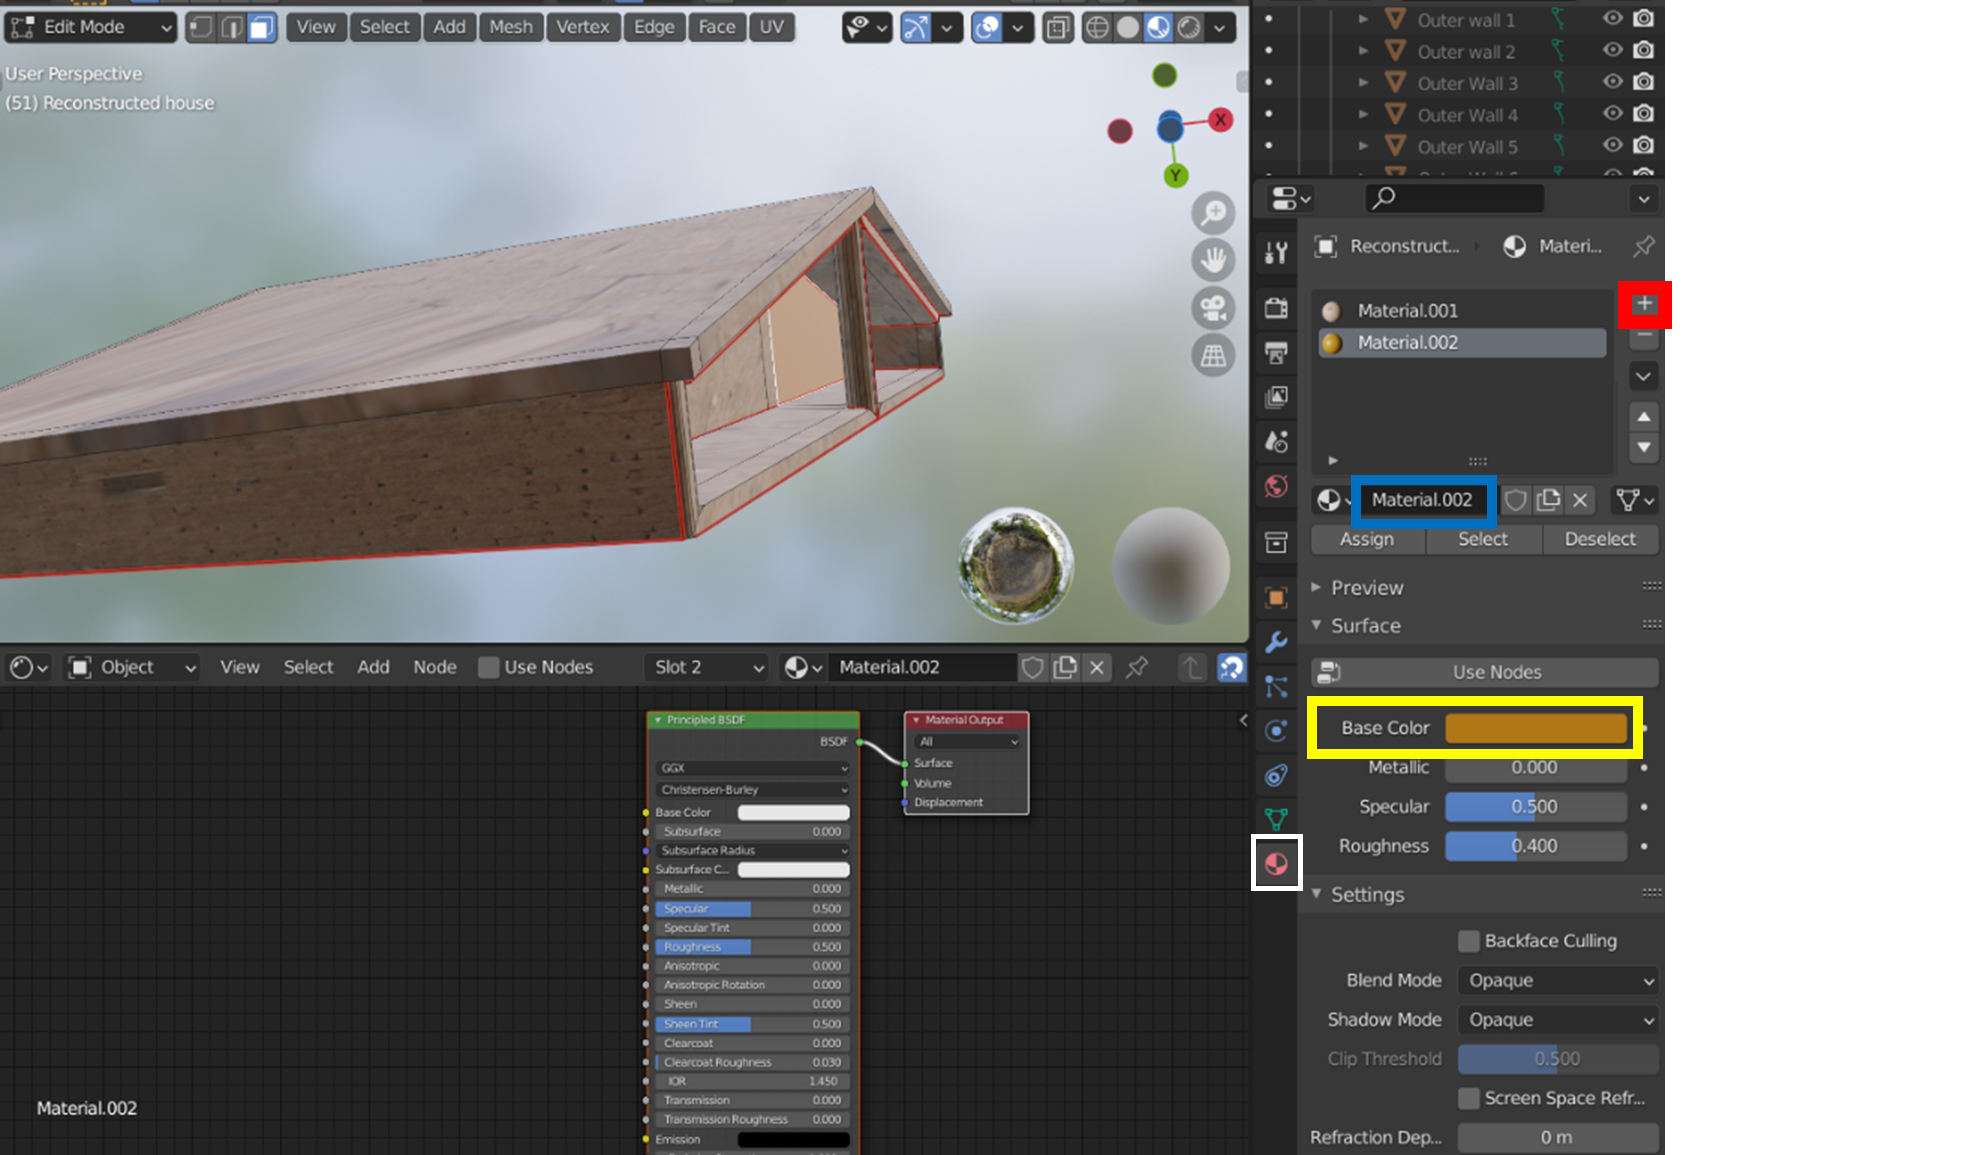
It is also possible to apply solid colours to your mesh – first, navigate to the ‘Material Properties’ options by clicking the red textured sphere (highlighted with a white square); click the ‘+’ button next to the list of materials to create a new slot (highlighted with a red square below). This will cause the name of the material (highlighted with a blue box below) to change to a button that says ‘New’ – press this and a new material will appear. You can change the solid colour either by clicking the ‘base color’ of the new material node, or click the ‘Use nodes’ button to turn it off, and click the ‘Base Color’ option (highlighted with a yellow box below) to change the colour. As before, click the UV island/faces you would like to change and assign this new material to these features.
This is only a fragment of what you can do with your reconstruction in Blender. As discussed in Exercise 2, it is an important skill to identify what is necessary to achieve the aims of the project, and what is possible in the time-scale you are given.
| Go back to Exercise 4 Part B to Finish Exporting | Go to Exercise 5 |